Lakier UV3D
This effect will intensify your design's colors but may also alter their hues, so do not apply varnish directly on white elements. The darker the color, the less visible the effect. Raised Spot Gloss Varnishing creates an additional layer of varnish applied on the design. The finishing enriches the project with a noticeable texture.
How to prepare a Raised Spot Gloss Varnishing design?
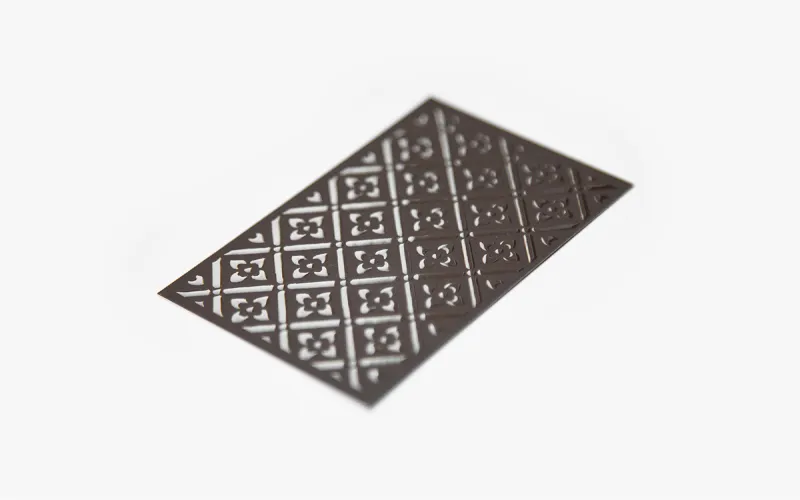
Each such design consists of two elements: a graphic design file and a layer mask with finishing elements. Raised Spot Gloss Varnishing requires an application of the Soft Skin foil.

Below you can find a photograph of a design which uses the aforementioned elements.
Core Requirements

Raised Spot Gloss Varnish should not reach the cutting lines and a 3 mm margin should be applied

The recommended font size is 12 pts and more

The minimum line thickness is 2 pts

The layer mask's black color value should always be K=100%

Do not apply the finishing in reverse, especially around fonts

Raised Spot Gloss Varnish is not entirely colorless but has a yellowish tint
Note that when designing a spot UV varnishing mask (3D UV varnish), the varnish must not cross the catalogue’s or folder’s crease/spine lines.

We do not recommend using this finishing on flat areas exceeding 9cm2
The uploading order of files
The choice of page that shall be enriched is decided by the uploading order of files. The first page of the uploaded project will be enriched.

Webinar (only Polish version available at the moment)
During this webinar we talked about the best practices and the most common mistakes; what looks great and what does not. We showed how to prepare the file step by step and order printing with gold/silver foil or raised spot gloss varnish.